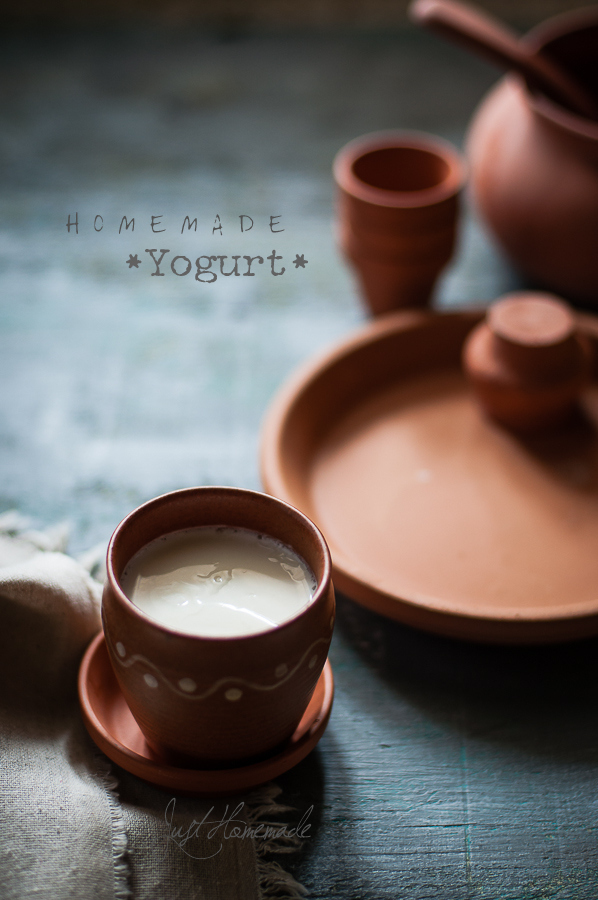
A good thick homemade yogurt. Freshly set. Warm and mildly sour after sitting overnight in a cozy spot. Not cold or straight out of the fridge. Creamy and custard like thick. Not gelatin thick and certainly not pectin thick. One that does not jiggle when the container is tilted from side to side, but peels away lightly and gives way to whey when scooped with a spoon. I’ll tell you all the secrets on how to make a good Homemade yogurt with or without starter culture.
Where should I start about Yogurt?
If I get carried away which I almost always do, I might start on a poetic note. Such as, if yogurt was a flower, I’d imagine it would be magnolia or white rose. But I am glad it isn’t. Because, hypothetically speaking, if there’s one good reason I can’t be a full time vegan, it has got to be yogurt other than ghee of course.
Really. You know what is indispensable in my kitchen? Store bought yogurt doesn’t compare to that. Not even the organic. Making Yogurt at home is incredibly satisfying just as much as making Ghee from scratch or baking one’s own bread if not more but with far less effort than either of them.
Throughout my childhood, homemade yogurt was taken for granted. It was presumed to be there, always. Though yogurt making went unnoticed as it happened past our bedtime, boiling milk was a different story and a tedious ritual in itself in my grandfather’s house where I spent all my childhood years. Every evening, freshly home delivered milk was brought to a slow boil on simmer over a period of an hour or two way past sunset until a thick layer of light yellowish cream formed on top milk. Then, boiled some more till the cream layer broke through. And boiled again at night as we kids went to sleep.
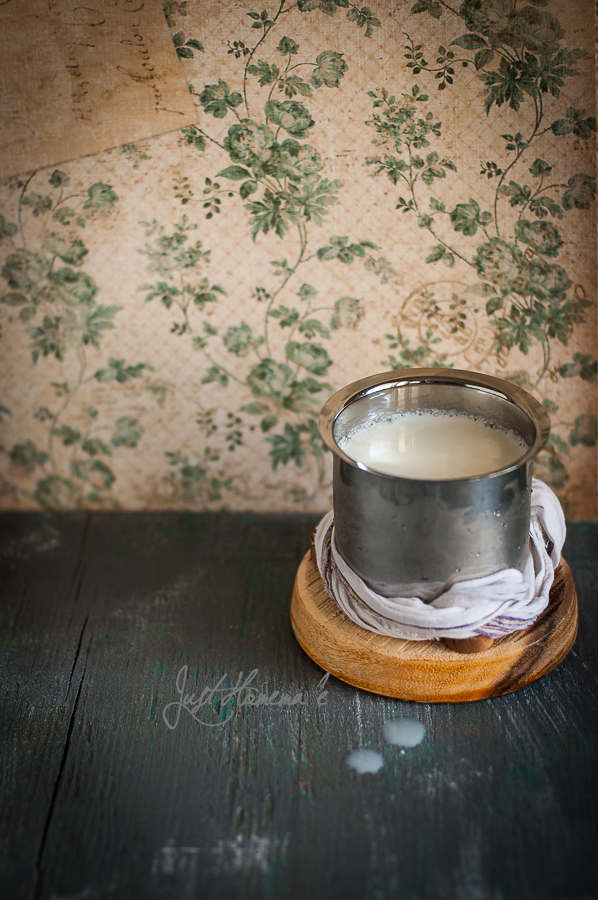
The next day, it would appear in front of us at lunchtime in a tall stainless steel vessel brimming with the lightest pinkish yellow shade of yogurt dressed with an inch of rich creamy blanket on the top. Lunch would end on a happy note with a scoop of this heavenly yogurt mixed with plain rice (curd rice as we call it) and an optional side of pickle – mango, lemon or whatever was freshly made and in season.
A comforting closure to a an everyday meal that started back then continues to comfort us even today.

Milk turning into yogurt overnight is magic. There’s so much physics (liquid converts to semi-solid), chemistry (lactose aka milk sugars are broken down into lactic acid) and the obvious biology (bacteria causing fermentation of the milk) all going on in one place. And yet, the naked eyes perceive it as just milk turning into yogurt.
Yogurt making is magic. It is definitely science. As well as art. I say art because, besides science, it takes a little TLC of nurturing hands to set thick yogurt consistently apart from the actual fermentation that happens on its own. I’ll tell you why.
I have seen my mom-in-law make homemade yogurt night after night religiously, a nighttime ritual set in my mind like the yogurt itself. It is just one of the many things that she goes about doing effortlessly, never giving it even a passing thought. Being the meticulous one that she is in everything she does, she made sure to be mindfully present through each of the steps as if she was in a chemistry lab, executing them to precision. Standing vigil to the boiling milk, cooling it in a water bath to the right temperature – not cold, not warm, not room temperature, not tepid, just hot enough to touch, stirring in the right amount of starter and following all of this consistently everyday.
I had never seen yogurt making given its due diligence this way before. Her methods yielded each time and every time a yogurt not mundane, but a treat that each one of us wanted to cut into to get the first spoonful of. Many of the tips on this post are what I’ve learnt from closely observing her yogurt making techniques.
I am partial towards traditional cooking methods and cookware which I have talked about often. I was always fascinated with yogurt made in traditional earthenware. Especially non-glazed natural clay pots. Being porous, clay absorbs water making yogurt thicker, creamier and keeps it cooler naturally. It is crucial to properly season the clay pot beforehand else the curd will have a mud like taste. Someday, I want to try making Yogurt in the traditional soap stoneware aka kal chatti like in olden days.

We Indians eat copious amounts of yogurt. Making yogurt at home is the easiest way to keep up with the perpetual demand for this white gold.
Yogurt is a one stop (protein + calcium + fat) piece of the food puzzle in the holistic approach to vegetarian diet. The good bacteria in yogurt which we all now know as the marketed term “Probiotics” aid in digestion. Yogurt has cooling properties, it is good for the gut and in turn for our immune system. It is suitable even for babies as young as six months whereas cow’s milk is not advised until one year.
Eat your homemade yogurt!
A few of my favorite ways to eat yogurt
I like it in Boondi raitha
I like it in Dahi vada or Thayir Vadai
I like it in the form of Majjige (Buttermilk)
Or plain mixed with rice and this Lemon pickle
Or this Mango yogurt granola parfait
Or this Bakala bath
Or this Mor Kozhambu
Or lapped up with this Paratha

Yogurt in the absence of starter culture:
I had heard about green chilli stalks used to make yogurt in the absence of any yogurt as starter (homemade or store bought). This was in the olden days. I had never tried it myself until I began to write this post. Though skeptical, I experimented with the idea in my kitchen to see if it works and was surprised at the results. It actually worked!
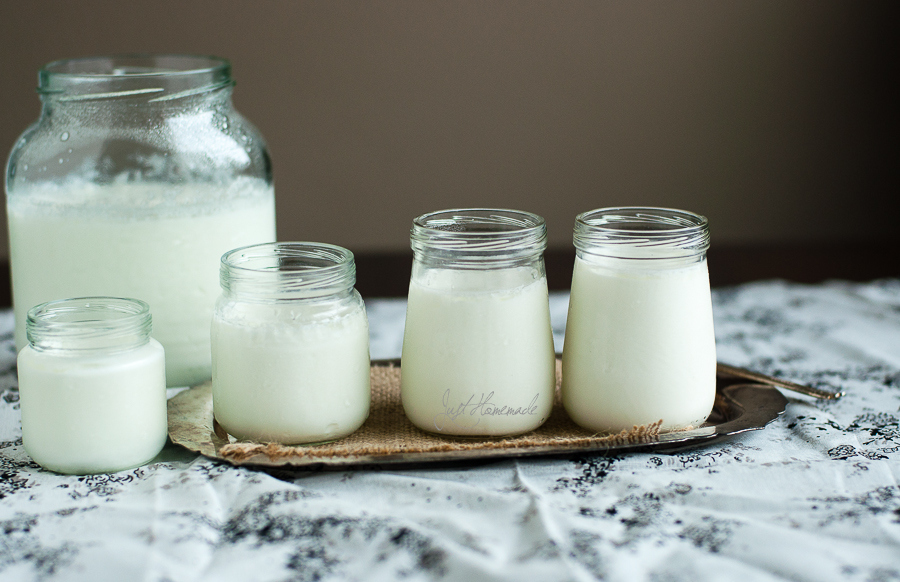
In this picture above, I have lined up for comparison yogurt made using yogurt from previous batch v/s that made using chilli stalk and that made with curdled milk using lemon juice. [Check the Tips section below for details]
Makes about 4 cups
- 4 cups organic whole milk cow’s milk, approx 1 litre
- 1 tsp homemade plain yogurt from previous batch at room temp (starter culture)
-
Place 1 tsp of starter yogurt in a clean container.
-
Bring milk to a boil stirring intermittently to not let cream from forming or milk from getting burnt at the bottom. Take it off the stove and let it cool either on the counter or in a water bath till steam has ceased and the pot is still hot to the touch (can't hold for more than 3 secs). It should be hotter than room temperature (and stay that way for a couple of hours).
-
Add this to the container with the starter yogurt and stir well. Cover and let sit in a warm spot untouched and undisturbed for 6-8 hours or overnight. (I leave it in the conventional oven overnight with the oven light on)
-
To check if it is set, gently tilt the container. Yogurt is set when it is not jiggly or runny and lightly peels away from the sides of the jar or bowl.
Any non-reactive container will do. Stainless steel, ceramic, glass work well. If using glass jar, fill the jar in hot water before adding the cultured milk to maintain the temperature.
Always save a couple of tablespoons of yogurt to make the next batch. That way you'll never run out of starter culture.
Use a washed container to make yogurt every single time. This keeps the yogurt fresh tasting without any foul taste or smell.
It is important that the starter yogurt is at room temperature and not straight out of the fridge.
When milk is simmered longer, it condenses and the resultant yogurt will be sweeter and thicker.
I use whole milk for kids and 2% for ourselves and both set very well.
Yogurt can be made from low fat and non fat milk as well. But, it will not be as thick or as creamy.
If making yogurt for your baby, empty baby food jars work very well for the right portion size and are handy and portable. For thicker yogurt, strain it in a muslin cloth or cheese cloth (I use cut pieces from soft cotton Dhoti). Do not discard the whey. It is high in protein and can be used in place of water to knead soft Chapathi dough.
If using fresh raw milk, make sure bring it to a boil to pasteurize it. If using non-homogenized milk (which is how I ate all through my childhood), a layer of cream will form at the top and resulting yogurt will have cream on top too.
To make yogurt making a habit, add it into your night-time kitchen wrap-up routine. After everything is done, set yogurt, put it away and come back in the morning for a perfectly well set freshly homemade yogurt ready to be devoured.
What you don’t need for this recipe
Food thermometer or slow cooker or yogurt maker or any expensive kitchen gadget
Which type of milk to use to set yogurt
Organic pasteurised milk – homogenized or non-homogenized
* Not ultra pasteurized (usually sold in tetra paks and sometimes in plastic gallon jugs. read the label to be sure). I avoid buying ultra pasteurized or ultra high temperature pasteurized (to increase shelf life) as it kills all the good bacteria that are needed for the yogurt making process which also kills all the enzymes needed to digest the milk proteins. I’d avoid buying this milk altogether even if it organic.
Organic raw milk – Though I have not found raw milk here in stores, I have used VAT pasteurized grass-fed non-homogenized milk with cream floating on top.
I’d avoid regular milk which comes from cows fed with gmos or injected with rbst hormones.
Tips to set thick yogurt
Milk needs to be hotter than room temperature but not too hot while the yogurt sets. It is crucial to start with hot milk and maintain the ambient temperature during the first couple of hours when the cultured milk coagulates. Touch test for the right temperature – allow the milk to cool to the point where you can touch the saucepan for 3 seconds.
Watch closely while the milk cools or it will become cold. If so, heat it again slightly to bring to the required temperature.
If you live in cold climate, put the yogurt to set in the oven leaving the oven light on overnight. If you don’t have one, the container wrapped in a warm towel can be placed inside a covered heavy vessel. Keeping inside a pressure cooker works well too, whichever holds the heat better.
In tropical climate, it takes 4-6 hours to set.
Troubleshooting
If the yogurt is too runny or takes longer to set, starter culture was either not enough or milk was not hot enough when culture was added.
Yogurt will turn out sour if it is kept to set longer than 8 hours (or overnight) or milk is very hot to begin with or the starter yogurt was more in quantity than needed. Extra liquid or whey on top are the tell-tale signs.
To fix sour yogurt, add 1/2 cup water along the sides of the container, let it sit for a bit and strain the extra liquid which reduces the sourness. Sour yogurt works great in recipes like this
What to do with yogurt gone very sour
Don’t discard. Use the solids as a face pack or mix it with henna and apply to your hair for natural coloring and conditioning. Yogurt is a great natural deep conditioner.
If you have a curry leaf plant, drain the whey into the pot. Curry leaf plant thrives with sour yogurt.
In the absence of a homemade yogurt starter culture
1> Borrow a small quantity from a friend or neighbor who makes good homemade yogurt. This is the most common technique used.
2> If there’s no homemade yogurt for starter, any good quality organic store bought plain yogurt will work well as long as it contains live culture (like S. THERMOPHILUS, L. BULGARICUS, L. ACIDOPHILUS, BIFIDUS, L. CASEI, AND L. RHAMNOSU). The texture of the resulting yogurt may be different at first (slimy like the store bought ones as they contain pectin for the consistency). After a few consecutive settings, it will turn out the way homemade yogurt should be – creamy, mildly tart, custard like, gives way to some whey when spooned.
3> Use green chilli stalks as starter
Boil and cool milk as mentioned in the recipe. Instead of starter yogurt, place green chilli stalk in the milk at the required temperature and follow the remaining directions. (I used 1 chilli stalk for 1/4 cup milk)
4> Use curdled milk solids as starter.
Boil and cool milk as mentioned in the recipe. In the pot, retain a little milk and add lemon juice to curdle it and use as starter.
I used 1/4 tsp curdled milk solids for 1/4 cup milk
For curdling, I added 1/4 tsp lemon juice to 2 oz boiled milk in the sauce pan and continued stirring on heat until curdled.
Use methods 3 and 4 to make small quantity yogurt which can then be used as starter yogurt for the next batch.
Observations:
Yogurt set well in both ways.
Yogurt inoculated with chilli stalk took longer (overnight + 6 hours) to set under the same conditions. It had a mild chilly flavor which should go away in subsequent batches.
Yogurt made with curdled milk solids using lemon juice took overnight + 3 hours to set.


Yoghurt made with green chilli stalk. I’ve never heard that one before. Does it have to be green (as in unripe)? We have some chilli in the garden, and it’s worth trying just because …
Thanks for a very interesting read.
Indeed. It sounds bizarre but works!
I have used unripe aka green chilli stalk. Though I haven’t tried it, have a feeling that ripe chilli stalk (or red chilli on the plant) should also work. Give it try with a small amount of milk and let me know how it turns out.
My dad makes the yoghurt in our household. It is both his job and his ritual. And on the days that it turns out exceptionally well, he prompts me for feedback if I forget 🙂
I will pass on your tips, including the very cool one about the green chilli stalks. Lovely words and pictures!
How cool of your dad Deepa..
Thank you and hope he likes it!
I enjoyed every bit of your story. Plus the tips
Will surely try them
Thanks for sharing
Great post and great tips! Do you know how to make yogurt with coconut milk?
Mimi, I haven’t made Yogurt with coconut milk.
One of my vegan blogger friends Harini has made cashew Yogurt using green chilli stalk like I have mentioned in this post. May be they are similar. Have a look at this post and see if it is of help.
http://tongueticklers.com/2013/04/vegan-kitchen-basics-an-update-on-making-cashewnut-curd-vegandairy-free/
Loved the post and the way you’ve presented it. Looks so fresh & delicious.
Funny last week my mother offered me her yogurt maker kit and suggested I made my own yogurt. The universe is trying to tell me something here, i’m onto it 🙂
Moms are the best! Take her word. As you can see it, the universe is definitely conspiring. Let me know how your experience is…
Hi, would you ever check out our blog and give us some tips? This is our first blog and we are very excited to start getting noticed. Thank so much!
Beautiful narration and gorgeous images. I love home made yogurt and have always made mine. it’s so rewarding and delicious.
Great post!! Yogurt would bend on the knees and thank you for such gorgeous pictures and for the wonderful info you have shared!! Really great informative post!
Not sure about Yogurt, but you certainly got me smiling ear to ear. Thank you!
Glad you found it useful.
very good tips radhika. your explanations are mouth watering. some recipes reminds me of mother.
another tip for starter is to put a piece of plantain leaf in the milk which mostly used by cooks in big events like marriage etc. if the curd is not set completely.
with love
malathy
Lovely tips. Could you please let me know where did you buy the clay pots from?
Those are from India bought few years back
if you happen to come to india you might want to pick up some more cool clay utensils from this homegrown brand called “mitticool”, they even hv a presuure cooker made of clay and many more cool stuff, jus chk their site, u’ll love it 🙂
Thanks for this cool info Dolly! I checked their website and seems like pretty good stuff!
hi radhika,
i make my own yogurt too but there is a slight variation in our technique.
we test it if it,s cool enough for the culture by poking the index finger slightly in
the cooling milk, towards the periphery of the milk surface and if the finger can tolerate it, its ready 🙂
we then add the culture with a slight sound (i dnt no d logic behind it , saw my mom do it al d time so i do it as well) ..u no d kinds u make ven u love or calm a baby or ven u see someone get hurt..tchh tchh tchh…this sound 🙂
and then dont stir the milk or anything, jus leave it covered alone in a warm corner, untouched, undisturbed, as if left alone to sleep for the night like everyone else in the family.
and in the morning whoever gets up first tests d curd to see if its set enough, by slight tilting of the vessel, and uncovers and keeps it in the fridge.
uncovering, my mom says, reduces its chances of getting unpleasantly sour 🙂
so that’s d curd making ritual in my house, my father has to, has to have curd everyday, he is so fond of it so we hv grown fond of it too 🙂
Dolly, Thanks for sharing your yogurt making ritual. It is interesting indeed to learn about the different nuances around yogurt making. I am sure each household has one to call their own 🙂
I like how you wrote “left to sleep like everyone else”
So true!
Yoghurt is a hero in the kitchen. I’ve just discovered what it can do to help improve digestion and keep the system lovely and clean! Love the blog
Hi! Is just one teaspoon of starter?
Hi. Thanks for sharing all the useful tips to make perfect homemade curd.
I made curd at home twice and both the times I had too much whey on top almost 1/4th of it was whey but the curd at the bottom was nice and thick. Please tell me how to avoid water in my curd.
I used 4cups milk boiled in microwave for 10mins, cooled down to a point where I could hold the container for 3seconds and dip my finger in for 10seconds then transfered it to a stainless steel container with 1/4cup starter curd at room temperature and closed the lid tight and kept it overnight in oven with lights on. In the morning I checked the curd. It had too much of water. Almost out of the 4 cups of milk that used 1 cup turned into water. I live in US. Please help me with this.
Poornima,
I won’t be able to comment on microwaved milk. I boil milk on the stovetop.
1/4 cup starter yogurt is a lot for 4 cups from what you have written. Please use 1 tsp starter yogurt and try. Do read the recipe here for details
Thanks for your reply.. I will try with 1tsp yogurt.
Very good tips on making yogurd/curd. I recently became a vegan and am trying out different types of non-dairy(coconut, peanut, almond) yogurt and chilli-stalk is a wonderful starter. I have used both green chilli and red ripe chilli stalk and both of them work beautifully. More info on how chilli stalk works as an excellent starter – https://www.quora.com/How-does-dry-red-chilli-help-in-curd-to-set-faster
I like your images! I made the yogurt following your steps, I did the whole process in a pure clay pot-didn’t turn it over into the glass bottles, the yogurt became really thick this way. I used Miriams Earthen Cookware clay pots they work really well as yogurt makers too.
When you use lemon juice as your starter 1/4tsp to 2oz boiled and cooled milk, is it 2oz in weight or 2 fluid oz? I’m a bit confused. Could it convert to 2 tablespoons even?
I have no starter yoghurt and my mum used to make it with lemon juice but I can’t remember how she did it exactly. The curd was beautiful. She used to tie a teacloth around the pot and keep it overnight in a warm place like on top of her boiler. I’m planning to culture in my airing cupboard as nice and warm in there. Or in my oven with the light on. Would this be ok?
Many thanks
Suzanne
Suzanne, it is fl oz. please do as you said. It has worked for me with the oven. Good luck!
OMG your instructions were amazingly explicit and following the instructions for using lime to curdle milk, I was able to create my very own home made yoghurt at first try!! I’m stoked!! ONLY, my mom said it wasn’t sour enough. Should I add more lime juice or leave to set for longer? I Actually planned on leaving it to set for 9 hours but forgot it in my oven and left it to set for 16 hours.
hi thanks and thanks so much for the tutorial. I made yougurt yesterday night and my mum was are u sure about this they I said with confidence just wait and watch tomorrow I will see yourgut.
then I made the yougurt and the time for checking it reached and it was watery bar then waited for some more hours and again the yourgut was watery.
and then I said am gonna keep it for more hours bar again I had to work so I left the yourgut within the blanket I told one person after 6 hours remove it and put in the fridge. and when I came back from work the work was thick and was thick before was put In the fridge. and am so happy thanks to this tutorial.
Hi
I m living out of india,amd i want to make sour yogurt.how can I make?
I basically use your method! Always use UHT milk full cream and works great too!
Didn’t know though that the milks allowed to boil. I always stop as soon as the first bubble appears, shall try boiling a bit!
Oh and another tip…make it during the day and at the end of the day put it in the fridge! Then you will have cold yoghurt in the morning. I once did it your way but the warm yoghurt after incubation is not very pleasant :-p
Cheers!
A
This is quite informative. I too make yoghurt at home but sometimes the output is not all that great. And I end up buying yoghurt and back with the starting point again. I have read each of your instructions and feeling positive that my family will continue enjoying homemade yoghurt.
The amount of protein in whey varies from 4 to 6%. Not 4 to 6% of the liquid volume but of the solids dissolved in it. Much of the rest is carbohydrates instead. Not sure where this protein myth came about.
Can you make thick yogurt with UHT milk
Zahir,
I don’t buy UHT milk normally. Thick yogurt is difficult to make with UHT milk as it is heated to very high temperatures to render it shelf stable.
As a result of that, the bacteria is killed and the protein in the milk is denatured as well.
Yogurt from UHT milk will not be comparable to what’s made with pasteurized milk. It might need thickeners which will also alter the taste.
thanks. I thought so too. I thought maybe you could suggest a solution
I use UHT and the yoghurt gets very thick. I put the culture at room temperature into the room temperature UHT milk and put it in an Instant pot on ‘normal ‘ yoghurt setting for 11 hours and it is thick and delicious. It improves after a few hours on the fridge, but just as nice straight out of the pot.
Thank you for the instructions with lemon and chilli to make your own starter!
I am not clear if the chili method and the lemon method creates curd or yoghurt as both are different.
We normally make curd everyday. Now we want to make yoghurt and no starter kit is available in our locality.
Give it a try and see for yourself. In the absence of yogurt, Chilli method creates the starter from which you can set yogurt/curd.
Radhika, Thanks so much for breaking this down so well in this post. I have seen youtube videos with the same, but I think you did a great job informing so well.
Here are some problems i am seeing:
* I tried making a starter with the lemon method, then it did go ahead and set yogurt beautifully (perfect texture). But for the longest time (a month later even), the yogurt did not develop that slightly sour taste you want. It stayed tasting like milk. Eventually this yogurt started curdling when I kept using it as a starter. I should mention I use a yogurt maker just to keep the temperature maintained.
* I have tried before making a starter with the chilli method, but that is too gelatinous for me and also tastes quite strongly of chilli. So, this method is probably not best for the texture I like.
Any tips on why the yogurt is not developing the sour taste eventually with the lemon starter method?
Thanks for writing with your findings Sonal
We must remember that these are alternatives methods to when we don’t have a starter yogurt at all.
I do agree with the chilli method giving that slight taste.
The starter become stronger with each iteration eventually like you have rightly observed.
I’m guessing it might be due to the lack of sufficient amount of probiotic bacteria
Hope this helps
Thank you for this lovely post!
Do you know whether all this info applies to plant-based milks such as oat, almond etc as well please?
I would love to try the thing with chilly peppers and lemon, but not sure if it’s the same with these milks. Also, do you know if I can use citric acid instead of lemon?
Finally, I would like to ask what happens after I take the yogurts out of the maker. Do I whisk them and refrigerate them, or just refrigerate and for how long? Or can I just eat it straight away?
Thank you very much for your help!
Best wishes,
Jana
Jana,
I haven’t tried with plant based milks
It can be tried with cashew milk. Do update here if you get to try out.
just refrigerate and use or use fresh at room temperature like we prefer to
How much of your previously made yogurt do you need to use for your next batch?